Installing security cameras outdoors presents unique challenges that indoor installations avoid. Weather exposure, temperature extremes, and physical security concerns require careful planning and proper techniques to ensure reliable long-term operation.
Choose the Right Location
Camera placement determines the effectiveness of your surveillance system. Position cameras to capture clear views of entry points, walkways, driveways, and areas where valuable items are stored. Mount cameras high enough to prevent tampering, typically 8 to 10 feet above ground level, while ensuring the field of view captures the area of interest.
Consider the sun's path when positioning cameras. Direct sunlight glare can render footage useless during certain hours. Use physical housings with sunshades or position cameras to avoid direct exposure to sunrise and sunset angles. Also consider artificial lighting from street lamps or neighboring properties that might cause lens flare.
Avoid pointing cameras directly at reflective surfaces like windows or water features. These create glare and can trigger false motion alerts. Test your camera positions at different times of day before finalizing the installation.
Weatherproofing Essentials
Outdoor cameras must withstand rain, snow, dust, and temperature extremes. Look for cameras with appropriate IP ratings - IP66 indicates protection against powerful water jets and dust, while IP67 allows brief immersion. These ratings ensure your cameras survive harsh weather conditions.
Temperature ratings matter as much as water resistance. Cameras operating in cold climates need built-in heaters to prevent lens fogging and ensure electronics function properly. Hot climates require cameras rated for high-temperature operation without overheating.
Cable entry points represent potential failure points. Use waterproof cable glands and silicone sealant to prevent water infiltration. Route cables to prevent water from running down the cable into connections. Always create a drip loop below connections so water drips off rather than flowing into the camera housing.
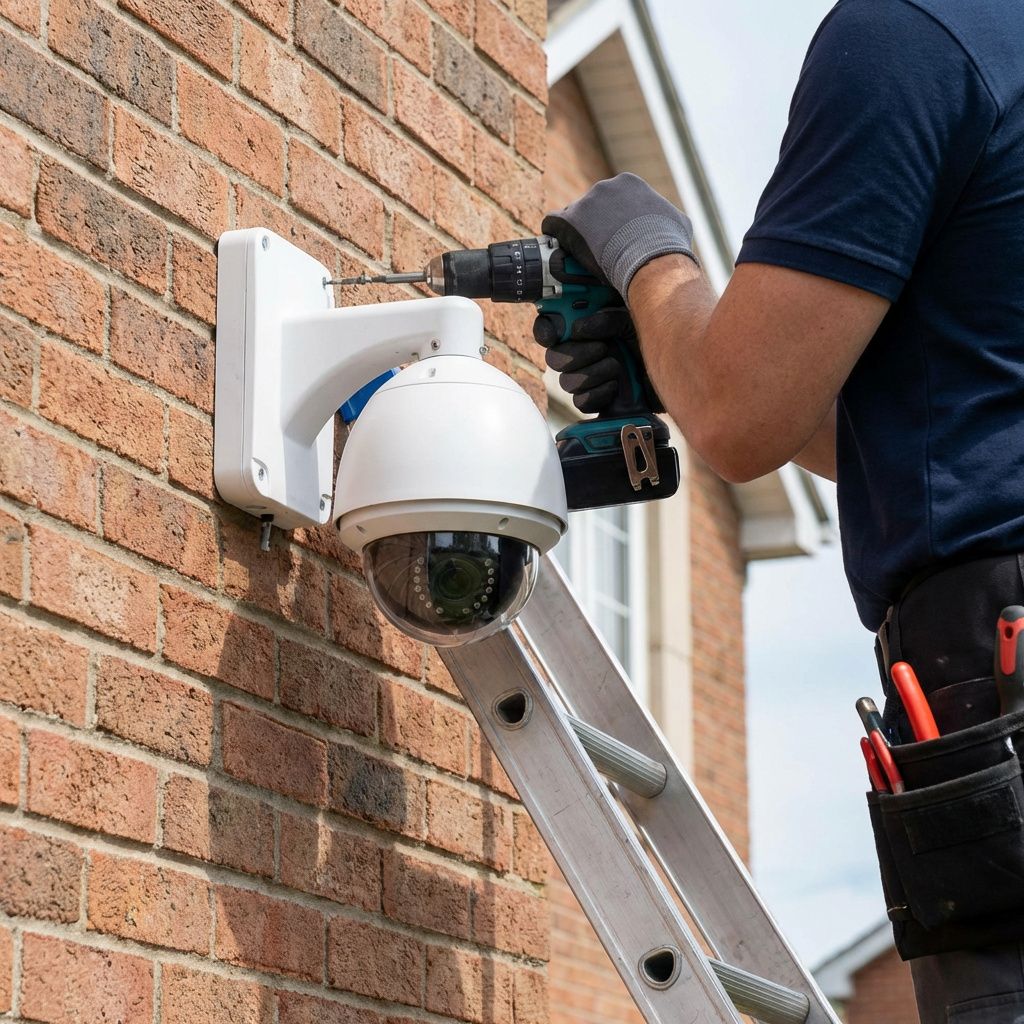
Secure Mounting Techniques
Proper mounting prevents camera movement from wind or physical contact. Use sturdy mounting brackets appropriate for your surface material. Masonry walls require anchors rated for the weight of your camera and bracket. Wood surfaces need screws that penetrate deep enough to resist pull-out forces.
Vibration from wind or nearby traffic can cause blurry footage. Use lock washers and thread-locking compound on mounting screws to prevent loosening over time. For areas with high winds, consider vibration-dampening mounts or choose cameras with electronic image stabilization.
Angle cameras downward slightly to capture faces rather than the tops of heads. This positioning also reduces sky exposure that can cause backlighting issues. For cameras monitoring large areas, a slight downward tilt improves depth perception in the footage.
Cable Management and Protection
Ethernet cables carrying power and data require protection from UV exposure, physical damage, and moisture. Use outdoor-rated cable with UV-resistant jackets for exposed runs. Bury cables at least 18 inches deep in conduit to protect against digging and rodent damage.
When running cables along exterior walls, use appropriate fasteners designed for outdoor use. Space fasteners every 12 to 18 inches to prevent sagging. Consider cable raceways for cleaner installations and additional protection.
Lightning protection is crucial for outdoor installations. Use surge protectors at both ends of outdoor cable runs to prevent damage from electrical storms. Ground all metal mounting hardware and consider using fiber optic cable for very long runs in lightning-prone areas.
Night Vision Optimization
Outdoor cameras often need to monitor areas in complete darkness. Infrared illuminators built into cameras provide night vision, but range and effectiveness vary. Ensure your camera's IR range matches the distance to your monitoring area. External IR illuminators can extend night vision range for large areas.
Avoid positioning cameras where vegetation might obstruct the IR beam. Spider webs are a common problem that reflect IR light and trigger false alerts. Apply silicone-based sprays to surrounding surfaces to discourage web building, or choose cameras with turret designs that are less prone to web accumulation.
Physical Security Considerations
Protect cameras from vandalism and tampering. Position cameras so they monitor each other when possible. Use vandal-resistant housings in accessible locations. Tamper detection features can alert you if a camera loses video or is physically moved.
Consider the cybersecurity of outdoor cameras. Change default passwords, keep firmware updated, and isolate cameras on a separate network segment. Physical access to cables could allow network infiltration if proper security measures are not in place.
Testing and Maintenance
After installation, thoroughly test camera operation under various conditions. Check image quality during bright sunlight, overcast conditions, and complete darkness. Verify motion detection zones and sensitivity settings. Test remote access to ensure you can view footage when away from home.
Schedule regular maintenance to keep cameras operating optimally. Clean lenses monthly to remove dust, pollen, and water spots. Trim vegetation that might obstruct views. Check cable connections seasonally for signs of water intrusion or loosening.
Conclusion
Proper outdoor camera installation requires attention to weatherproofing, positioning, and physical security. Taking time to plan your installation and using quality materials ensures your surveillance system provides reliable protection for years. Regular maintenance keeps your system operating at peak performance.\n\nAfter installation, you will need to decide how to store your footage. Read our comparison of NVR vs cloud storage options to choose the right solution for your needs.
After installation, you will need to decide how to store your footage. Read our comparison of NVR vs cloud storage options to choose the right solution for your needs.